Tuesday, October 9, 2012

Gothic Heart

Hi there.. I used the lovely work of Zindy in this tag..
I think this is a lovely scrapkit that you can purchase with the tubes. You can purchase it HERE

I also used the animation of  Lovey's Shack. The animation is called  SoftPinkHearts-MNG-Lovey.mng  they don't really look pink.. more like white.. there were red ones too.. but they just didn't look as good.
1. Open a new image 900 x 900.

2. Pick the bkg paper you want and apply a Mask on it.. I used WSL_Mask 362 which you can find at Weescotslass' Blog 

3. The background in the frame was the one that came with Zindy's Tube.. I just used deform tool and pulled it out some, so that it fit the frame.

4. You 'build' the tag just like in the previous tutorial.(doing the back layer to front) Doing the mask layer first..add the dots element.. the bkg from tube, the frame, girl, ivy, word art, flower , heart, the Love word art. Don't forget your 3d drop shadows.. and the copyright info. Arrange it all like you want.. merge/visible, when you get it just like you like... re size it 75% or so. 

BTW..about putting copyright info on tags etc...even when you re size something you are suppose to be able to read the copyright info.. but don't make it so huge that that is FIRST thing you see on a tag... that's very unsightly I think. Just my opinion there.

5. Click on top of window..Copy , over to animation shop and right click , paste as a new animation.. You duplicate the tag so that you have 16 frames OR how ever many frames the animation you picked has.

Select all the frames.. in both the new tag animation and the heart animation... click, hold and drag on the frame 1 of the heart animation and drag it over to the frame 1 new tag animation.. NOT letting go of the mouse button till you get it placed just where you want the animation on the tag.. then let go of the mouse button.. View your animation now and check to see if it looks right..Ctrl+Z if it isn't on both windows..start over if it isn't, If its OK then.. SAVE AS a .gif.. You're done!! I hope you enjoy doing the tutorial... if you have any questions feel free to write me..click on bug :)


Toodles till next time

Monday, October 8, 2012

Anna Liwanag Christmas

In this animated tutorial I used Anna Liwanag's tube, you can find it at the CDO store, she is also known as Nocturne at PFD store (Pics for Design. Not sure if this tube is there.. but I know it's at CDO. When you use it...don't forget to use your license number!!

I included all the elements you see in the above tag in the supplies zip.. also the animations...I do give credit for the animations to the creator Lovey... I thought it might be easier if I included them.. but this is where I got them..HERE... plus a lot of other GREAT animations that Lovey does.
For the LIFE of me I can NOT remember who's mask I used in the bkg on this tag.. I had made the bkg paper myself.. and used someone's mask..way back months ago.. and I've blinked since then.. and don't remember..hehe if someone recognizes it or knows it's theirs, please let me know and I will give proper credit!

1. I started off big like I always do, new image at 900 x 900.
 Copy and paste the paper masked bkg to your new working image. Build the tag as you like.. or like I did..there is a round snow scene that's included in the supplies..copy and paste it next, then the gold frame.. apply a 3D shadow to the frame and move it over the snow scene. you can merge down on those two where you can't move them off of each other again.

2. Copy and paste all the snowflakes.. then the woman tube... you can arrange the snowflakes now after you get the woman there.. copy and paste the bow, roses and leaf.. duplicate the leaf twice..
for some reason.. even in REAL paintings.. you never want to put an even number of something like flowers...leaves etc... its always uneven.. like 3..5...7  etc of whatever :)

3. When you get it all placed like you want.. merge/visible and save as .PNG.  You can either open it in your Animation Shop  or have it in PSP and Copy then go to A.S. and right click on the A.S. desktop and Paste as a new animation..
When I start to animate it.. I re sized 82% cause both the animations were 15 frames and the file was gonna be HUGE if I didn't do the re size. 
 You can go ahead and duplicate your tag so that it has 15 frames, Cause the animation has 15 frames.

4. After you have duplicated the tag ( there is a button up at the top of A.S. that duplicates frames).

Open your Animations that you want to use..The way the creator of them made them... was the first Frame is her info.. so you can cut/delete that first frame.. Now select all frames, select all frames on your tag image also... make sure your on FRAME ONE on each of them...now on the animation (pay attention where the animation is centered etc.. click on the first frame (all have to be selected) click, HOLD your mouse button down.. while dragging it to your tag's frame ONE also.. when you get it where you want it.. THEN let go of your mouse button. if you don't drag to Frame one with all selected its just not gonna work.. :( if it didn't work right..  Ctrl + Z to undo.. on both the animation and the tag animation... then try again... once you get the hang of it.. its easy from then on..Check your animation with the view animation button.. if all is ok .. then save as a gif. If you have any questions just ASK me.. click on the butterflies.


There ya go... you should be done..
Toodles till next time

Pink Zindy


For this tutorial I used Zindy's Tube 'Your Angel'  you can purchase her HERE..make sure you use your license # when you use her.
I made all the elements for this tutorial. Everything included in the supplies zip but the tube.

I made this tag in Photoshop CS5... if you don't have it...it can certainly be made in your PSP. I'm not going to be going through detail.. on how to use PS-CS 5 at this time.. this is assuming you know your way around photoshop..
1. Open a new image 900 x 900 . Copy and paste the pink paper that's in the supplies zip. You can apply a mask to the paper if you'd like.. being I was in Photoshop I used one of my grunge brushes on the bkg... in black..stamping it around where I wanted,  then while on that layer.. click the FX at bottom right and do a pattern overlay on it using the bkg paper in supplies as a pattern.
2. I included both the dot line and the circle of dots.. if you'd like to make the circle yourself.. I will show you how.
open your dot line.. go to image/canvas size and enlarge it to 3" x 3"  or 1200 x 1200... that's just to give you room to use


3. Might have to resize your dots  by Ctrl + T in Photoshop or Image/resize in PSP.. as a %. I love Photoshop's transform tool.. it doesn't make the graphic blurry.. in anyway... can twirl in any direction.. in PSP the transform tool always blurs the item.
4. Set the dots in the center.. open the Copies plugin
and use these settings, referring to the capture below.


5. Place the circle dots on top of the Masked Paper layer.. next you place the frame... flowers, halftone splatters and bow the way you'd like..


6. On the Zindy tube.. I applied a drop shadow and also.. an outter glow in pink.. I show how in photoshop.
7. Below I applied a drop shadow to the bow.


That should be it for you.. when you get it all arranged like you'd like... don't forget your copyright info for the tube..(sorry I know I sound like magpie all the time about copyright but we gotta be careful) Merge/Visible and save as a PNG . Feel free to resize it now.
If you have any questions feel free to write me, click on the kitty

Hope you enjoyed the tutorial
Toodles till next time

Beautifall


Hi there... I will be using PSP 9 and PS-CS5 for this tutorial.. You would need an basic knowledge of PSP and PS.

I'm using Amy Stoffel's 'Beautifall' scrapkit this time.. you can find her beautiful work at Scrap Matters.
Also I am using a Pinup Toon Girl from the CDO store you can purchase it HERE.. No plugins needed this time

1. Open a new image 900 x 900 , you can always re size later.. I make my tag (image) big cause most of the time I make them for Incredimail header.... then resize smaller for the matching tag.
2. Open the element astoffel-beautiful-scatter 3.png. Re size it 20% then transfer it to your new image. I applied a soft 3D drop shadow on it.. using a soft brown.

3. Pick one of the papers from the kit, re sized 16% and drag to the working image on top of the scatter layer,   apply a Mask to the paper.  I used WeeScotsLass' mask  WSL_Mask 84 it can be found HERE  

4. I used one of the frames that came in the kit and put a fall scene in it..Now it's just a matter of placing all the elements and girl tube, in the places where you want them.. You can use my idea up above or do as you like in the positioning. Don't forget your 3D drop shadows on them all!! 

5. After I get the image looking like I want.. I merge/visible and save as a PNG.. then I head on over to my Photoshop CS 5.
 I love my PSP I have used it for 15 plus years.. but just the last year.. I've been using/ learning PS-CS3 and just now got the CS 5.
it is far and away better in most ways than PSP is.. BUT wont ever NOT use my PSP :) Fear not hehe

I have made captures of PS CS 5 while I am doing the Text on the Beautifall graphic(tag). In Photoshop, using its Bevel and Emboss is just WONDERFUL!!!

(Note).. if you do not have PS-CS 5 or any Photoshop.. just do your text in PSP.. that's fine..apply an inner bevel and 3 d drop shadow with PSP.

Text made in Photoshop CS 5

6. Ok first, open the saved PNG in Photoshop..

FYI:  You can't open files in Photoshop in .PSP format... so that's why I save everything in either .png or .psd format  The .PSD saves the layers separately. That way you can open in both PSP and PS.

Using the Text tool.. the T is over to the left side where your tool bar is..
7.  If you want the text filled with a paper , you first have to open the paper in PS CS and go to Edit/ Define Pattern... a lil box pops up and you just click OK. (its loaded now) You can close out the paper .  Any patterns, papers, textures..etc, you always have to do this edit/define pattern first.. so that the paper etc is loaded. and that way you will have the open to use it when filling text.. or any other things you would need it for.. comes in handy when you have a set of papers, like if your making a scrapkit and want your elements to match your papers you created.. you would load all those papers in the kit into patterns.. You can also save that set of patterns, name it and reload it at any time.


8. While your on the Text layer click the FX button down at the bottom right... refer to the picture..


While you have the Layer Style box open.. you can do all three things.. PLUS alot more....fill the text with a material , put a bevel and emboss on it also a 3D drop shadow...If you so desire also a stroke around the outside edging. All out of one menu box


9. Position your text the way you like it and go to layers/merge visible and save..over right the existing one you had saved earlier OR save it with a new name and so that way you also have the tag without any text on it.

That should do it... re size it as small as you like... for your tag.. remember your copyright info.. that's a must!!
If you have any questions feel free to write me. Click on the butterflies to send me an email

Toodles till next time

Sunday, October 7, 2012

Whoo's Ready for Fall


Also the artwork of ©Suzanne Woolcott you can purchase her art HERE

Plugin used: Filters Unlimited 2

1. Open a new image 900 x 900  you can re size later.

2. Open whichever bkg paper you would like to use..  re size it 
20 % , drag over to your new working image.

3. Go to your Plugins/ I.C.Net Software/Filters Unlimited 2/Edges, Square  and use one of the edges.. there are 17 there to choose from.

4. Choose another bkg paper re size it 15% . Copy and paste it on to your working image.
(this is if its a 3600 x 3600 sized paper to start with)

5. You can either use your Filters Unlimited 2 again and pick another edge.. OR use a Mask OR like I did in PS-CS5  , on the green paper, I used the eraser tool and used one of my grunge bkg brush and (erased) all four sides, along the edges. Hey you can do that in PSP also!!

6. Use the 3rd bkg paper you'd like now, re sizing it 20%.  Copy and paste the bkg paper on to the working image. Open the scalloped frame that's in the supplies zip (its black)  copy and paste it on to your working image also (we're using it as a pattern).

7. Be sure to be on the black frame layer.  Go to Selections, Select all, Float, defloat 

8. Invert, (select the 3rd paper layer then CUT or delete on the keyboard. You should have a scalloped frame made from the 3rd paper you had chosen. You can delete the black frame layer now. Apply an inner bevel and a 3d drop shadow on the frame.

9. Copy and paste the fall misted image I supplied in the supplies zip on to the working image. Make sure its layer is BELOW the frame layer.

10. Fill a new layer with a coordinating color, have this layer below the frame layer.

11.Using the magic wand tool , select the middle of the frame area...(be on frame layer) it should have the marching ants around the middle area...go to  Selections/Modify/Expand 6 pixels.. INVERT  CUT ( making sure you are on the color layer you previously filled.) Look at the tag above and see how it looks.

12. Using whichever elements in the kit you'd like.. arrange them as I did.. or do your own thingy...:) Don't forget your 3d drop shadows... it ALWAYS looks better with the shadows, looks very unfinished if you don't. 

13. Add your girl graphic if you like..Add her 3D drop shadow.

14. You can either use the word art that's in the kit or make your own..
You're done!! If you have any questions feel free to write me a note, click on the spinning flower.
Toodles till next time

Saturday, August 25, 2012


I wrote this tutorial on Aug 25, 2012 . Any similarity to any other tutorials is a coincidence.
I wrote this tutorial with the beginning PSP'r in mind.. with details and lots of screen shots.
Plugins that you will need for this tutorial:
Scrapkit used is a PTU kit from  Toxic Desirez 'Kitty Kandy'
Art Graphics is from Nevilk Rocoo Wagner.. FTU artist
You can click on the above tag.. to see it better... the finished tag will be 900 x 900  I just re sized it so it would fit on the blog page.

1. Open the star frame that comes in the Kitty Kandy scrapkit..

BTW: you can use any scrapkit you want to.. just need a frame, you can always make your own star frame using a preset shape and fill it with one of the bkg papers. 
Shift + D to duplicate the window and close the original frame. Good habit to get into. Re-size the frame 80% , make sure its UNCHECKED where it says re size all layers.
Go to Image/Canvas Size and type in 900 x 900 you can always re size later. Minimize this Star Frame image


2. Open the paper frame that's in the kit. its too long for what we need. So we're going to edit it. Duplicate, close out the original paper frame. We are NOW working on the paper frame window.

If they aren't already turned on.. go turn on your ruler guides  that's under VIEW. Pull out your working image window so that you see beyond the side of the graphic, make a selection from 200 to 400 that's about in the center.. don't have to be precise. 


3. Click delete button or 'cut' to delete that part out of the frame, deselect.


4. Make a selection over the left part of the frame/ copy/ paste as a new layer .While it's still selected make sure you on the frame layer and do Cut again..the two halves will be on their own layers.  


5. Now move the left side of the frame over to the right  and match up the two parts to make one frame.. merge/merge down.You could of used the deform tool BUT it would of changed the frame in a way you don't want.


6. Use your Magic Wand tool now and click on the inside of the frame to select it. Selections/ Modify/Expand 7 pix.


7. Pick one of the SOLID bkg papers that come in the scrapkit, these are tagger sized bkgs.. if your working with a full sized kit you will have to resize it to 19% or so...You can also fill with a coordinating color. You image should still have a selection on it.. With the bkg paper window active..drag the bkg paper layer from the layer palette over to your working image. It should look like below. Selection/ invert and making sure your on the bkg paper layer is selected.. click delete or cut.. This will have the frame with a  bkg behind just the center of the frame.


7. Use your selection tool on ellipse, feather set on 30. Start in the center and pull out the oval selection.. make sure the selection does NOT touch the edges of the frame.. like below. Have to do it smaller than you think cause its feather is on 30 and it expands out further than you think.

8. Add a new raster layer, and fill the selection with one of the colors you're coordinating with.


9. I applied a texture using Filters Unlimited 2 or Texturizer  this is an option


10. Merge all the paper frames layers and drag its merged  layer from layer palette to your working image that you minimized a while ago.


11. Image/rotate/free rotate, using the settings below


12. You can now copy and paste the girl tube onto your working image.

13.  Drag (or copy and paste) one of the bkg papers you like from the kit to the working image.

( BTW: moving one image to another image you simply drag its layer from the layer palette over to your working image window, another way is to copy/paste as a new layer)

On working image, drag that paper layer to the bottom on the layer palette..where its BEHIND (or under) all the layers,  go to Layers/load/save mask/ Load mask from disk..and apply a mask on it.  I used WSL_Mask225  she has some wonderful masks.. you can find them HERE
14. After you apply the mask, look on the layer palette it shows like 3 layers to the mask... right click on the top layer and merge/group. This is always done after applying a mask.


15. Use your magic wand selection tool and making sure your on the STAR FRAME layer click in side of it. It will have the marching ants around the inside..Go to selections/modify/expand 3 pixels.  Choose another paper, drag it over to the working image under the frame layer,  and go to selections INVERT now making sure you are on the new bkg paper layer hit delete or cut. it should just leave the paper on the inside of the frame. Remember your UNDO if its not..and may I say THANK GOODNESS for UNDO!!!

Your working image/ tag should look like below.. you can arrange things as you like.. it doesn't have to look like mine.


16. Its a good habit to get into, to name your layers as to what they are.


17. You need to duplicate the Star frame. Oh I forgot the above picture only shows 3 duplicates of the STAR FRAME... I ended up duplicating one more time..
So you end up with ONE original STAR FRAME and 3 duplicated star frames.. so 3 altogether..


18. Now time for the confusing part :) Hide or X out your original STAR FRAME by clicking the eye beside it's layer. Also hide 2 of the other STAR FRAMES... doesn't matter if you start from the top or bottom. Lets say you start from the top.. have it highlighted on the layers palette.. go to Effects/Alien Skin/ Xenofex 2/ Constellation. Put the settings as it shows below. Make sure its set on the transparent. Click OK then hide its layer you just applied that too and go to the next 'copy of Star Frame layer' back to Xenofex 2 all you have to do is hit the Random Seed button.. don't change any of the settings. Click OK  hide that layer..get on the next STAR FRAME Layer back to Xenofex 2 and hit the Random Seed button again.  All 3 of the duplicate layers of the Star Frame should have the Xenofex 2 applied to them.


19.  NOW you apply an Effect/ 3D effects/ drop shadow on the original STAR FRAME as below.


20.  Now I merged some layers.. so that this wouldn't be so confusing.. all the layers ABOVE the STAR FRAME Layers  I merged , all the layers BELOW the original STAR FRAME layer I merged..  you don't have to.. but it leaves less on the layers palette to get confused about. As you can see below


21. Open your Animation Shop

22. Now you hide 3 of the STAR FRAME duplicate layers.(have one showing of the duplicates)
You always have the top and bottom merged layers UN HID also the original STAR FRAME UN HID. Look at the above picture if its confusing.. RIGHT CLICK on the top of your working image and COPY MERGE...  go to your Animation Shop and right click on its desktop.. paste as a new animation.
23.  Back to PSP and hide the one frame duplicate you had showing and UN hide the next one either up or down which ever direction your going. Right click on the top of the working image COPY MERGE  back to AS  right click on the frame window that's there and Paste / after current frame. Back to PSP hide that duplicated Star Frame and UN hide the next one, Right click on top and COPY MERGE, back to AS and Paste/ after current frame.. Back to PSP and same process.. Hide and Un hide the correct layers.. back to AS paste /after current frame. 


24. You SHOULD end up with 4 frames to your new animation... check to see if it looks right by clicking on the  button on the top (next to last button on the tool bar.. run your mouse over them will tell what they are, it says View Animation) if all looks alright.. then Save as a .GIF.


Hope you had fun.. see you in the next tutorial
TOODLES
Norma

Friday, August 24, 2012

Purple Lola

I wrote this tutorial with the beginner PSP'er in mind.. more sample pics..basic instructions..That way everyone should be able to do it.
 The finished tag will be larger than the sample above..
You can click on the sample images to enlarge them so you can read them.


 The supplies zip includes 4 flowers, 2 bows, 1 staple and 6 bkg papers.
plus the 3 girl graphics ©Lola Art...it is free to use.. you can find her wonderful artwork here:  www.lolaart.net
1 PSP brush **put the brush in your my psp files/brush folder**
I used PSP 9 for this tutorial, you could use other versions.. with a few minor adjustments.


1.  Open your SWT-Purple 1 and SWT-Purple 2 bkg tiles.  Go to Filters Unlimited 2 to Edges, Square. you can use any edge you want.. but I used #17.  Use same edge on each of the bkg tiles.
They should look like this
2. Open a new image 500 x 500  you can crop and resize later if you'd like.
3. Copy and paste these two bkg papers on to your new image.
On the SWT-Purple 2 bkg ... go to Image/Rotate/ Free Rotate , Left/ Free  15%


   4. Arrange your bkgs like I have in the finished tag.
5. Copy and paste the pink bkg tile on your working canvas.. no edging is applied to it. Go to Image/ Rotate/Free Rotate and use the settings below.
                  You 3 bkgs should look about like this below..
                   6. Apply a 3D drop shadow on the two bkgs that have the edging to them NOT the top pink bkg.
Settings below.
                   7. Copy and paste the Lola girl tube that's misted.. Center it in the middle of the pink top bkg.
Click on your ERASER tool 


** we're not wanting to put color on the pink bkg tile.. we're wanting to erase it in the shape of the brush**  now find the @DanasDoodle4 brush, in your drop down eraser brush menu.


                   8. Use the eraser brush on all 4 corners of the pink bkg paper.. just clicking ONCE.. on each corner.. On the top and bottom corners you don't have to adjust the rotation of the brush. But on each side.. you will have to set the rotation of the brush to 90 degrees.   
 Position your brush like the sample below where the petals of the flower brush is as shown.
SIDE Shown
                  TOP shown
                  9. Now apply a 3D drop shadow to that paper. Use these settings.


                   10. Your paper should look like this...
Like a hole puncher was used on it..... we just did that to this bkg paper :-)
11.  On the two small Lola pictures that were in the zip... copy and paste as new layers.. and drag their layer under the pink paper layer. Position them as the sample shows.. the one on the bottom was rotated around 18%. Any other things that you want to add, you can at this time.. in my finished tag.. I have the flowers and a bow.. The Bow and the misted girl would be merged together... and anything that's below the pink paper would be merged.. you end up with only 3 layers. ok?
12. ok , think of a sandwich :)  everything on top of the pink bkg paper is bread.. and everything below it is bread.. the Pink paper is meat.. your layer palette should look like this. Hey its the only analogy I could think of :)
                  13. Select the pink paper layer that's in the center and duplicate 2 times.. so you end up with 3 layers of the pink bkg papers, with a merged layer on top and a merged layer on bottom.
                  14. Click on the top copy layer of the pink bkg tile, use Xenofex 2 Constellation with these settings on it.. Hide that layer now by clicking the EYE at the right of its layer. and select the next copy of the pink bkg tile. Back to Xenofex 2 and use same settings except this time click the random seed button... Hide this layer now.. and select the original pink bkg tile layer on the layer palette and go back to Xenofex 2 and use same settings.. clicking the random seed button.
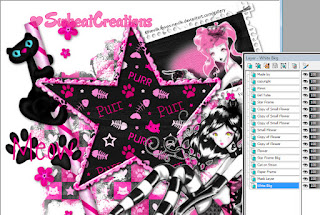
                  15. You have 2 layers on the layer palette hidden or X'd out.. or SHOULD.. go to the top of the window of the canvas and  right click COPY MERGE... open your animation shop and right click on its desktop and PASTE AS NEW ANIMATION.  Go back to PSP and HIDE the Xenofex 2 layer that's showing.. and UNHIDE one of the other pink paper layers.... COPY MERGE (again).. back to Animation Shop and Right click on the frame there.. and paste behind current frame..  Back to PSP and hide that Xenofex 2 layer and unhide the last one... remember just have ONE Xenofex 2 layer un hid at a time,  do your COPY MERGE again back to Animation shop and PASTE behind current frame...  
                   Check your animation to see if it looks right with the animation preview button.
You might need to crop your animation now..Don't export to PSP and crop it there... but while it is in Animation Shop ) (AS) Be careful that you don't crop off any of the designs on the top, sides or bottom my mistake. Below shows the crop button.. then draw out your crop box like shown then click the crop button.. your done!! All you have to do is SAVE AS a gif...


                   I hope you enjoyed this tutorial.. till next time..

TOODLES